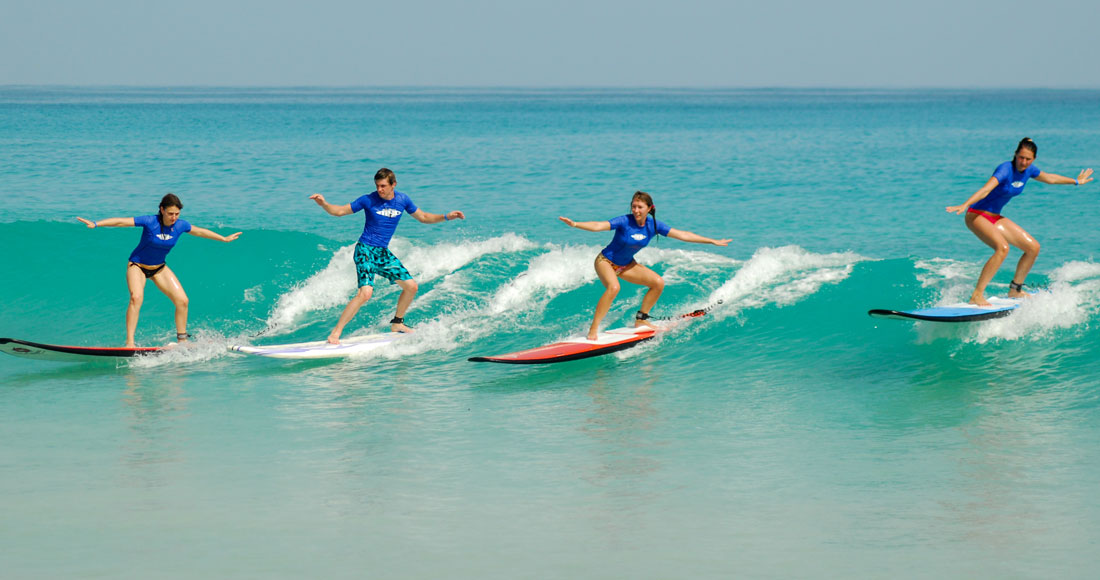
Maybe you crave Laird Hamilton’s abs. Maybe you were entranced by Craig Anderson’s butter-milk style. Maybe you just need a hobby. Whatever it is, before you start surfing (unless you want to lose 100% of your dignity, get abused by locals and give up after two weeks) you’re going to need a guide. And no matter how well versed you are in surf brands—there’s more to surfing than looking the part. Here’s how to nail it.
Buying Your First Board
Sure, the pros look cool. But if you buy the same boards as them, you make a difficult task impossible. More so than most other sports, in surfing you need radically different equipment depending on your skill level.
- Start on a large, stable, foam board, and get the basics down-pat, before moving on to progressively shorter boards
- Adults should start on something between 7 and 8ft
- Kids or lighter adults should be on something around 5-7ft
- Heavier individuals should go even longer—9ft if possible
- Skipping board progression lowers your wave count and doesn’t make surfing fun
Our Recommendations are:
The MF Beastie FCSII
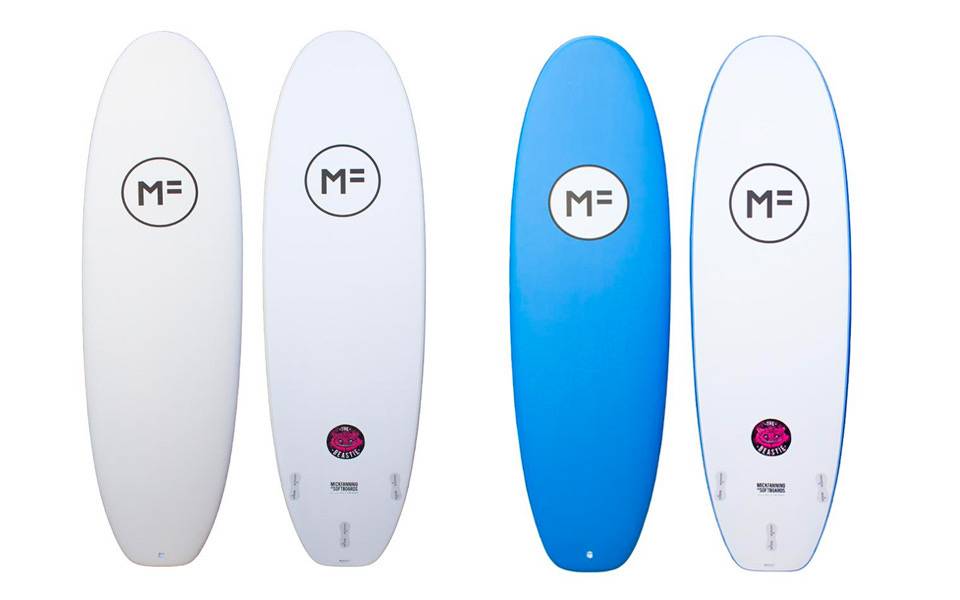
Shop Now
Catch Surf Odysea Log

Shop Now
Buying Your First Wetsuit
A common beginner mistake is to blow all your money on the latest pro-model shortboard, spend the remaining $50 in your bank account on a leaky, second hand piece of (neoprene) crap, paddle out in the wrong spot, freeze your butt off for 15 minutes, and go home without catching a wave. But at least you looked cool in the parking lot, right?
- Make sure your suit is thick enough to keep you warm (for a Sydney winter you’ll want a good quality 3/2, for a Torquay winter you’ll want a 4/3 with boots—or maybe even a 5/4)
- A new entry-level suit is a better investment than a second-hand high-end model (unless you have the exact same body type as the previous owner)
- To work out what thickness you need, check this chart
- To work out size, look at the size chart on the website of the brand you’re buying (it differs between brands), or—even better—head to your local surf shop and try one on
- Remember: your wetsuit should be tight (so water doesn’t flush through), but not so restrictive you can’t move
- Value for money brands include Xcel, NCHE and Need Essentials
- RipCurl tends to be more expensive, but durable
- Quicksilver and O’Neil tend to start out super comfy and flexible, but have been known to waste away quickly
- Zipperless wetsuits are more convenient (but wear out more quickly) than chest zip wetsuits
- Chest zip wetsuits are warmer and more convenient than back zip wetsuits (but wear out more quickly)
Our recommendations are:
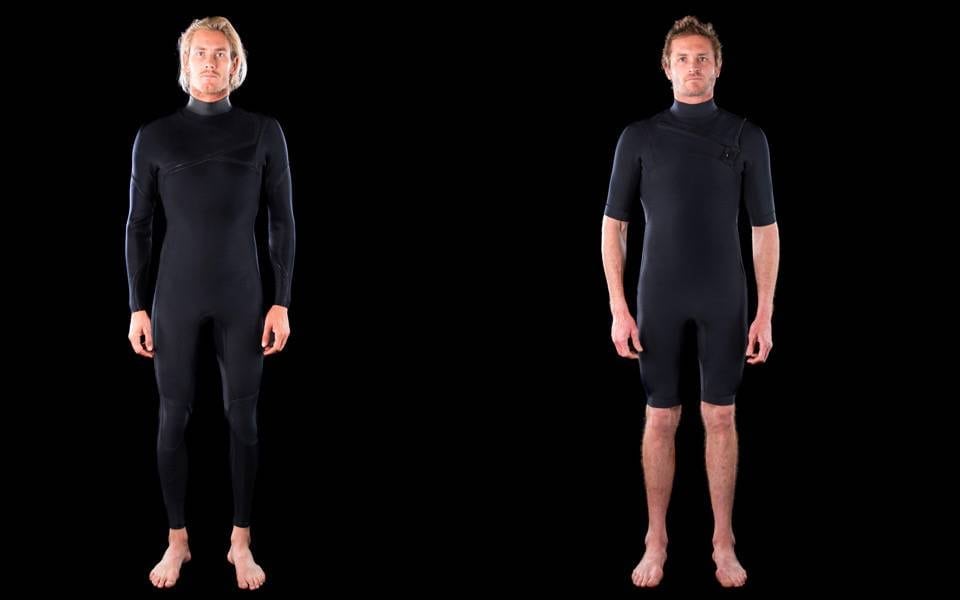
Need Essentials 3/2 Chest Zip Steamer (Left) & 2/2 Springsuit (Right)
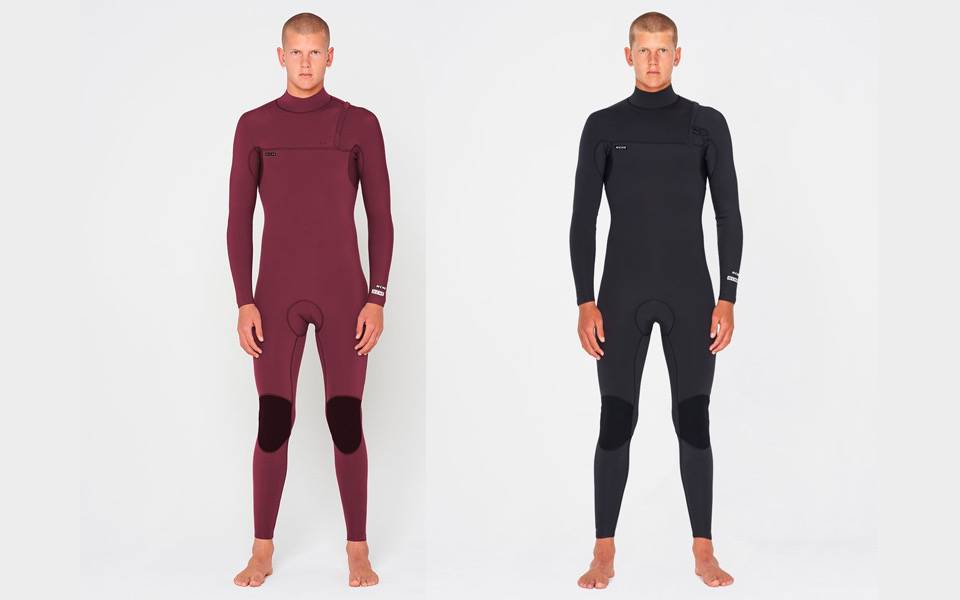
NCHE Zipperless 3/2 Wine Taster & Black Steamer
Shop Now
Essential Rules & Etiquette
Pissing people off in the surf is a bit like road rage—except you can’t lock your doors and drive away. You’d think this would make the line-up a civilised place, but if you’ve ever surfed anywhere popular, you’ll know: humans always find a way to suck. So to avoid potential fisticuffs on the beach, these are the rules to follow.
- Don’t drop in (i.e. don’t catch a wave someone else is already riding)
- Don’t catch a wave if someone next to you has been waiting longer than you and is making a move to catch it. Top tip: if they are better than you, assume they will catch it. However, if they are also a beginner, be ready to take it if they fail (don’t do this to people who are good though, as you could get in their way or cause a section of their wave to break prematurely)
- Keep track of who has priority. Generally priority is determined by who is closest to the peak (where the peeling wave first starts to break), then in the following order. 1) Locals who have been waiting a while for a wave. 2) Locals who have just caught a wave. 3) Outsiders who have been waiting a while. 4) Outsiders who have just caught a wave
- Don’t snake: if you are waiting for a wave next to someone with priority, don’t paddle around them to get closer to the peak. Conversely, if you have been waiting ages and someone paddles around you to “snake” your priority, let them know you’re onto them…
- To avoid getting in people’s way, paddle out in a rip or channel; once you are out the back you can make your way over to the peak
- Don’t bail (throw your board behind you) when you are paddling out. If you are’t skilled enough to duck-dive or eskimo roll under the whitewash then you shouldn’t be out there. Wait for a smaller day
- If you are paddling towards a wave someone is surfing, unless there’s room for you to sprint past before they reach you, it’s common courtesy to paddle into the whitewater, leaving the open face free for them to surf on
- Be fun! Call other people into waves. Smile
- Don’t be too fun. Claiming every wave like Gabriel Medina whilst surfing like a flailing hunchback won’t score street cred
Despite reading all this, reconcile yourself to the fact no matter how well you understand the basic unwritten rules, as a beginner your lack of ocean awareness means there will be times when you get in someone’s way and are unable to do anything about it. Don’t stress: just do your best and don’t surf on big days that are out of your ability level.
Reading The Surf Report
Understanding the surf forecast is a crucial part of surfing, especially as a beginner who doesn’t have the skill set to deal with a wide range of conditions. Popular forecasting websites we recommend are Swellnet, Coastalwatch and Magic Seaweed. These websites should tell you the size, direction and period of the swell, the strength and direction of the wind and the tide. Here’s how to make sense of it all.
Size
Each forecasting website will have a slightly different scale, so it’s usually best to stick to one, and over time you’ll get a feel for what they really mean by “2ft”. As a beginner 1-2ft conditions are ideal, anything over 4ft should be avoided (unless you find a protected spot that is 2ft when everywhere else is 4ft—but more on that later). A common beginner grumble is, “The forecast was wrong.” But 9/10 times you just read it incorrectly. This is because a “2ft” wave can arrive at your beach looking more like 4ft (or completely bypass your beach and not break at all), depending on the swell direction, period and the tide.
Direction
If the waves are from the south and you live at a south-facing beach, the waves will be the exact size forecasted—or bigger. If you live at a North facing beach (during a south swell) then you will miss the brunt of its power. In terms of wind direction, if the wind is offshore (coming from the land blowing out towards the ocean) then the waves will be held up longer, making them cleaner and steeper. If the wind is onshore (blowing from the ocean towards the land) the conditions will be messy, and the waves will crumble. Although these days look uglier, as long as it’s not howling, a gentle onshore can make the waves easier to catch for beginners. If the wind is “cross shore” (blowing up or down the coast), North facing beaches will be protected (and clean) in a southerly wind, and south facing beaches will be better when the wind is from the North.
Swell Period
This refers to the number of seconds between each line of swell. Typically the longer the period the better groomed (and the more powerful) the waves will be. Shorter period swells are known as “windswells” and are often weaker, short lived and provide lower quality waves. Long period swells are known as “groundswells” (if a big one of these comes through the forecasting websites normally include a “experts only” disclaimer in their surf report).
Tide
Some places work better on a high tide, some work better on low or mid. Check your local spot using a forecasting website and it should tell you. Low tide tends to produce steeper waves, so if you are learning it’s best to stick to mid or high tide.
Pay Wall
Unless you are planning a trip, day to day it’s not necessary to pay for the “premium” versions of these sites (which lets you see the forecast for more than a few days in advance), because (normally) a forecast only really becomes accurate a few days out anyway.
Reading The Ocean
Before you paddle out, check where the rips are, and where the impact zone is. Ideally, you want to paddle out in the rip and catch waves in the impact zone. Unless you have literally just started learning (or aren’t a strong swimmer), in which case you should stick to waist deep water, wading out into the impact zone as far as you are comfortable, and catching white-water. For everyone else, here’s some tips to get you onto the waves no one else was in position for.
- Bigger lines of swell will break further out
- Smaller lines of swell will break closer to shore
- Paddling sideways away from the peak can buy you time if a wave is breaking too soon
- Paddling sideways towards the peak can help you catch a smaller wave you would otherwise have been too far out to get onto
- Waves take longer to break at high tide (so if you notice the tide starting to get higher, take up a position closer to the beach)
- Waves break more aggressively at low tide
- Rips are characterised by sand, debris, and where the waves are breaking last (or not breaking at all)
Exercises To Help You Improve Faster
In the words of the best surfer in the world, John John Florence, “The best training for surfing is surfing.” Although he’s right, he’s currently out of action with an injury. Maybe it was preventable, maybe it wasn’t. Either way it can’t hurt to be fit, strong and flexible.
- Yoga will help with flexibility and breath holds
- Cardio (especially freestyle swimming) will prepare you for a punishing paddle out
- Swimming laps underwater (never do this alone) will help you deal with wipe-outs
- Weight training should (in a balanced way) target your lats, chest, shoulders and back, to increase your paddle power. Some great examples are push ups, pull ups, dips, bench press, deadlifts, and one arm dumbbell rows
- Although you won’t spend much time on your feet as a beginner, having strong legs helps once you’re up and riding. Try squats, calf raises, sprint shuttles, leg presses, leg extensions, hamstring curls, and the glute/abductor machine
- More important than strength is balance, which can be improved (marginally) by spending time on balance boards and skateboards. But really the only way to improve your “surf balance” is by surfing
Our recommendations:
The Indo Board
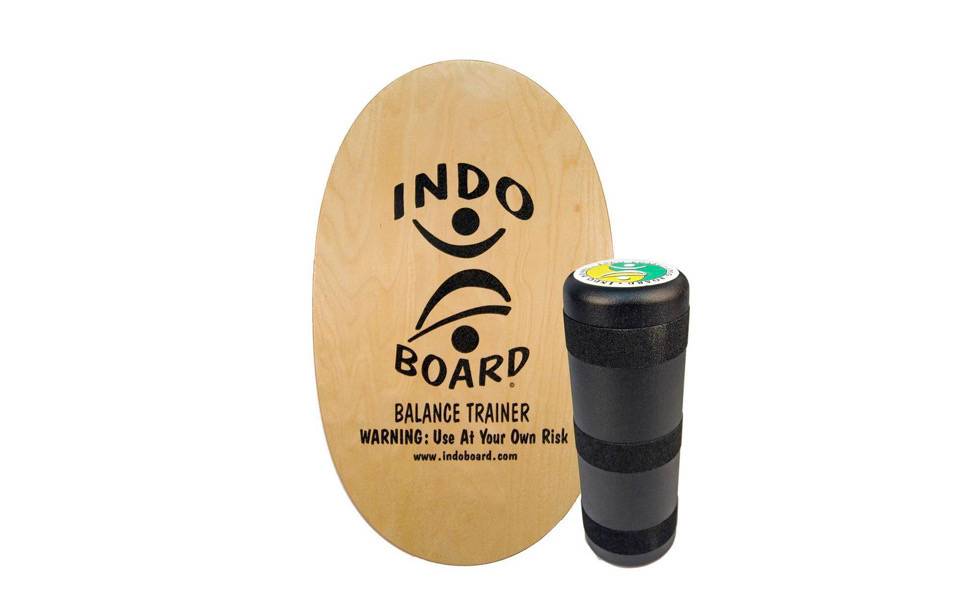
Shop Now
The Proteus “Surfskate” Carver
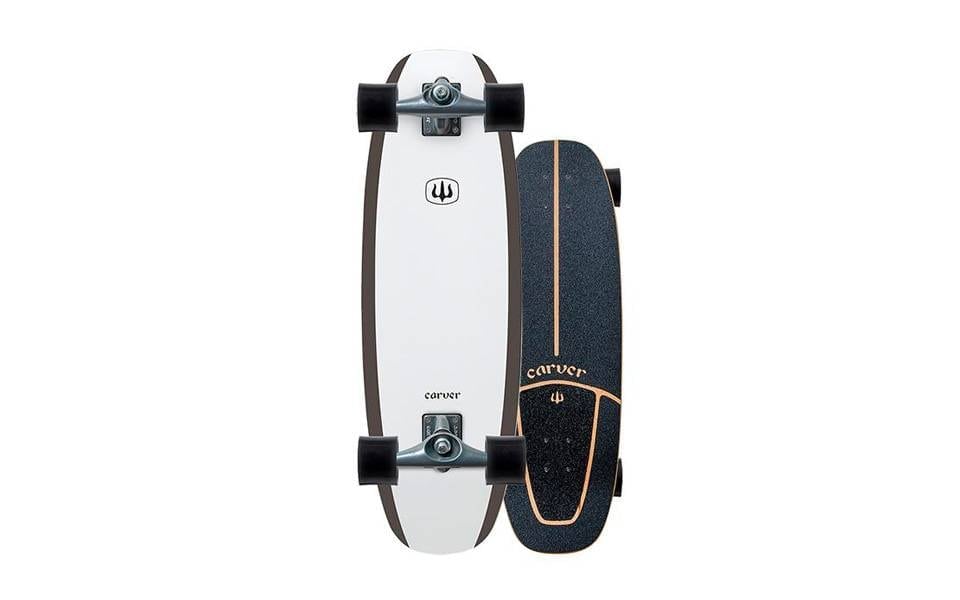
Shop Now
The Benefit Of Lessons
- Great way to learn in a safe environment
- Great way to nip bad habits in the bud
- Teacher can tell you the best place to surf
- Meet like minded people
The Disadvantage Of Lessons
- No teacher can put in hard yards and the years of experience it takes to become competent for you
- Getting things wrong painfully (i.e. paddling out in the wrong spot) teaches you quicker than an instructor explaining the theory (then making all the decisions for you)
- Can be expensive
Best Break To Learn In Australia
Each spot has its day, depending on the conditions. That said, if we had to pick an ideal beach for learning, we’d pick somewhere warm, consistent and with lots of surf schools. By that measure Manly, Bondi, Newcastle, Byron Bay and Noosa are all excellent places to learn to surf. For intermediates, Bali, Morocco and Portugal are also incredible places to surf, relax and travel. If you have some serious cash, the Maldives is known as intermediate surf heaven: a gentler version of Indonesia’s Mentawais, and just as picturesque.
Safety
- If you wouldn’t be comfortable swimming in from out the back (behind where the waves are breaking) to the shore, don’t go out
- Too many people rely on their leg ropes and board to get themselves out of dodgy situations, but the truth is—anything can happen
- Surf with a friend
- Talk to the Life Guards in summer to get the lowdown on the conditions, and make sure you keep your “swim fitness” up
Resources To Learn & Watch More
- Beginner Mistakes & How To Fix Them
- The Pop Up – Video Tutorial
- The Takeoff – Video Tutorial
- Catching Unbroken Waves – Tutorial
- How To Do A Top Turn & Bottom Turn
- How To Tell If Your Stance Is Correct
- How To Do A Cut Back
- How To Duckdive
- How To Choose A Board
- Etiquette Video Explanation
- Surfboard Volume Explained
- Benny’s Board Room (board review website)
- BeachGrit & Stab Magazine (surf news)
- World Surfaris (to help you pick your next surf trip)
- LetsSurf (like gumtree but to find a surf tutor)
- Gumtree (best place to find a second hand board)
- Marine Layer Productions (best surf blog)
- Cluster (surf movie)
- Barbarian Days (one of the few surf novels both surfers and non surfers will enjoy)
- Chasing Mavericks (big wave movie)
- Big Wednesday (the OG surf flick)
- The Surfers Journal (print mag)